

How to Utilize Nvidia’s Latest Chat with RTX AI Bot
Since the groundbreaking launch of ChatGPT, the computing sphere has eagerly awaited a local AI chatbot capable of running independently from the cloud. Nvidia has now provided a solution with Chat with RTX, a local AI chatbot that empowers users to leverage an AI model to analyze their offline data.
In this guide, we will walk you through the process of setting up and utilizing Chat with RTX. Keep in mind that this is only a demonstration, so anticipate encountering some bugs while working with the tool. Nonetheless, it is poised to pave the way for more local AI chatbots and other similar local AI tools.
Downloading Chat with RTX
Downloading and configuring Chat with RTX entails a slightly more intricate process than one might anticipate. Although the initial step involves simply running an installer, it’s important to note that the installer may encounter issues, and certain minimum system requirements must be met.
You will require an RTX 40-series or 30-series GPU with a minimum of 8GB of VRAM, as well as 16GB of system RAM, 100GB of disk space, and Windows 11.
Step 1: Retrieve the Chat with RTX installer from Nvidia’s official website. This compressed folder is 35GB in size, so downloading it may take some time.
Step 2: Upon completion of the download, right-click on the folder and select “Extract all.”

Step 3: Within the folder, you’ll encounter several files and folders. Opt for setup.exe and proceed through the installation process.
Step 4: Prior to commencing the installation, the installer will prompt you to specify the location where you wish to store Chat with RTX. Ensure that the selected location has a minimum of 100GB of disk space available, as Chat with RTX downloads the AI models during installation.
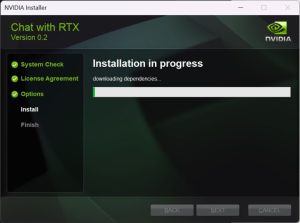
Step 5: Be prepared for the installer to take upwards of 45 minutes to complete. If you notice it momentarily hanging, do not be alarmed. Additionally, note that the installation process might temporarily slow down your PC, particularly during the configuration of the AI models. Therefore, it’s advisable to step away momentarily while the installation wraps up.
Step 6: It’s possible that the installation might encounter a failure. In such cases, simply rerun the installer, opting for the same location for the data as before. The installer will resume from where it left off.
Step 7: Upon completion of the installation, you’ll find a shortcut to Chat with RTX on your desktop, and the application will open in a browser window.
Using Chat with RTX with Your Own Data
The primary allure of Chat with RTX lies in its ability to leverage your own data. It employs a technique called retrieval-augmented generation, or RAG, to sift through documents and provide answers based on their contents. Rather than fielding any question, Chat with RTX excels at responding to specific inquiries regarding a designated dataset.
While Nvidia includes some sample data for experimentation, unlocking the full potential of Chat with RTX necessitates integrating your own dataset.
Step 1: Establish a folder where you’ll house your dataset. Take note of the location, as you’ll need to direct Chat with RTX to this folder. Presently, Chat with RTX supports .txt, .pdf, and .doc file formats.
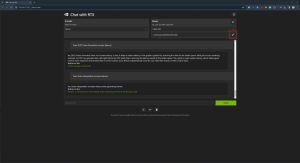
Step 2: Launch Chat with RTX and click on the pen icon within the Dataset section.
Step 3: Navigate to the folder where you’ve stored your data and select it.
Step 4: Within Chat with RTX, click on the refresh icon in the Dataset section. This action will regenerate the model based on the newly added data. It’s advisable to refresh the model each time you append new data to the folder or select a different dataset.
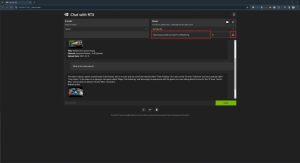
Step 5: With your data integrated, choose the model you wish to employ from the AI model section. Chat with RTX offers Llama 2 and Mistral, with the latter serving as the default option. While both models are worth experimenting with, Mistral is recommended for newcomers.
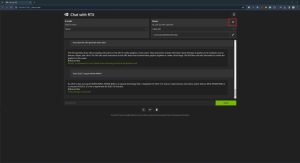
Step 6: You can now begin posing questions. Nvidia cautions that Chat with RTX does not consider context, meaning previous responses do not influence subsequent ones. Moreover, specific inquiries typically yield more accurate results than general ones. Additionally, Nvidia acknowledges that Chat with RTX may occasionally reference incorrect data when furnishing a response, so bear this in mind.
Step 7: If Chat with RTX encounters issues and restarting the application fails to resolve them, Nvidia suggests deleting the preferences.json file to rectify the problem. You can find this file at C:\Users\\AppData\Local\NVIDIA\ChatWithRTX\RAG\trt-llm-rag-windows-main\config\preferences.json.
How to Utilize Chat with RTX with YouTube
In addition to leveraging your own data, Chat with RTX offers compatibility with YouTube videos. The AI model operates based on the transcript extracted from the YouTube video, presenting some inherent limitations.
Firstly, the AI model cannot perceive anything outside the scope of the transcript. For instance, inquiries about physical appearances in the video are not feasible. Moreover, YouTube transcripts may not always be flawless, which can affect the quality of responses, especially in videos with messy transcripts.
Step 1: Launch Chat with RTX, and within the Dataset section, choose YouTube from the dropdown menu.
Step 2: Below the dropdown menu, paste the link to a YouTube video or playlist. Adjacent to this field, you’ll notice a numerical indicator denoting the maximum number of transcripts you wish to download.
Step 3: Click on the download button next to this field and await the completion of the transcript downloads. Upon completion, click on the refresh button.
Step 4: Once the transcript retrieval process concludes, you can engage in conversations akin to those with your own data. Specific questions tend to yield better results than general inquiries. Additionally, when discussing multiple videos, Chat with RTX might misconstrue references if questions are overly broad.
Step 5: If you wish to engage in conversations regarding a different set of videos, you must manually delete the previous transcripts. Adjacent to the refresh button, you’ll find an option to open an Explorer window. Navigate there and delete the transcripts to initiate discussions about alternative videos.